Monday, February 24, 2014

Washi tape decor


Remember this hot mess?  I have a boy and girl in the same room and have had the worse time trying to cohesively decorate it since she wants princess and he wants all boy.  So I gave up.


Talk about a hodge-podge!!

Then I had my friend over to help me with staging ideas.  She suggested emptying the room of all clutter and decorating with one color on both sides that neither of them could really fight over.  I had already said I would take down the existing mismatched curtains and put up full white sheers to make it cohesive.  But white  on the purply-blue walls looks so girly.  As a way to accommodate boy and girl, she suggested going with GREEN.  Perfect with the white to pop against the purply-blue walls.  BTW, that purply-blue was my initial boy/girl compromise color....it definitely worked.  

So I have to add some green decor, green bedding, de-clutter, touch up paint, finish the dressers, blah, blah, blah.  Lets talk about the fun stuff.  The bedding is the next project on my list but let me show you what I came up with for the decor.

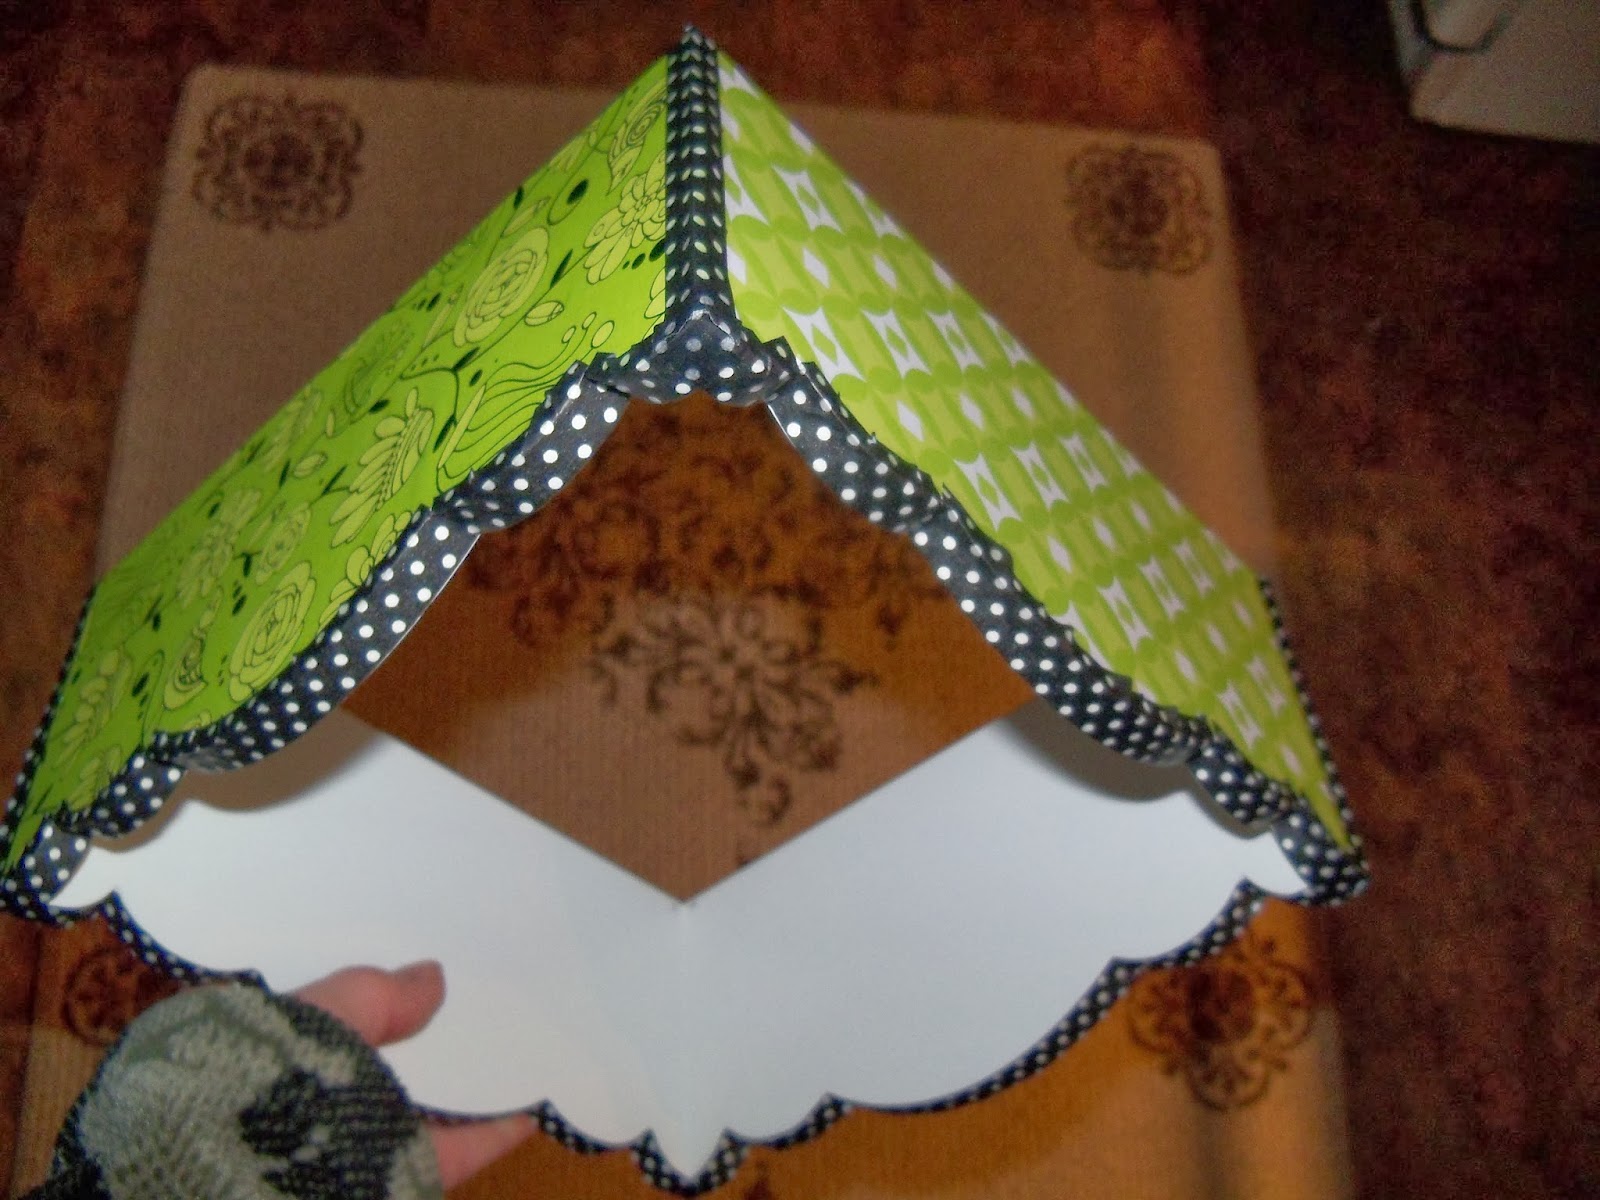
Funny that you can't see in any of the photos from before but I had three of these little white shelves over each bed.  She suggested painting them green.  I agreed, but solid green is just too plain for me.  So scrapbook paper to the rescue again!


I had the daughter trace the shape of the shelf onto the back of various sheets from this scrap pack - 24 times!!!!

No really, she did about 15 and I did the rest.  I had to cut them all out. Whew!  


I used white glue to adhere the paper.  I did not dilute it as I would have to decoupage since the paper was thick and I just wanted to stick it on there.  No too worried about protecting it and I had other plans for the edges.


WASHI tape!  I glued the paper on one day, let them dry and then went back with the WASHI tape to edge it out.


Since my paper cutting skills aren't perfect, I wanted to cover the imperfections with the tape so I let the excess hang to the outside.  A few corner clips and it laid down nicely.  Because it is a papery tape, the wrinkles in the tape lay nice and flat when you press them with your thumb.  If you are really OCD, you could make clips in the tape all the way down.  I won't lose any sleep over these wrinkles.


I also trimmed down each side to clean up those seams.


I like the contrast of leaving the inside white.  See my project supplies still piled up in the background?  Busy, busy, busy.


These with the polka dots will go on the daughters wall.


These with the "racing stripes" will go on the son's.


Hopefully I can complete the bedding next and pull it all together to show a finished room.

Friday, February 21, 2014

Painted rugs


This project is one that I actually did as the first "work on a project" meetup, so you are seeing them out of order.  The first project meetup was actually a bust, no one was able to show.  With the weather here lately, I knew it would be hit or miss.......but hey, I scheduled it since I'd be working this project anyway.....and having it scheduled made me work the project.  So win-win.


Here is what inspired me to try this....from Pinterest.  Not sure if it is woven or painted but it made me think of paint so I decided I must try it.  Of course I couldn't find a stencil of that design or that big.....so I wung it.

I want to paint a cheap run to look like this with a stencil.

The one rug, I decided would be a try-me since it had more pile than I think is usual for a painted rug.  And the price is bearable if I totally screw it up - free!  This remnant came from a garbage pile where the neighbors put pieces when they were recarpeting.  This is a remnant of the new carpet, not used.  But hey, I am not above that either, depending on the purpose.  The other pieces I grabbed are in my attic now, forming a nice walkway over that darn splintery plywood floor.


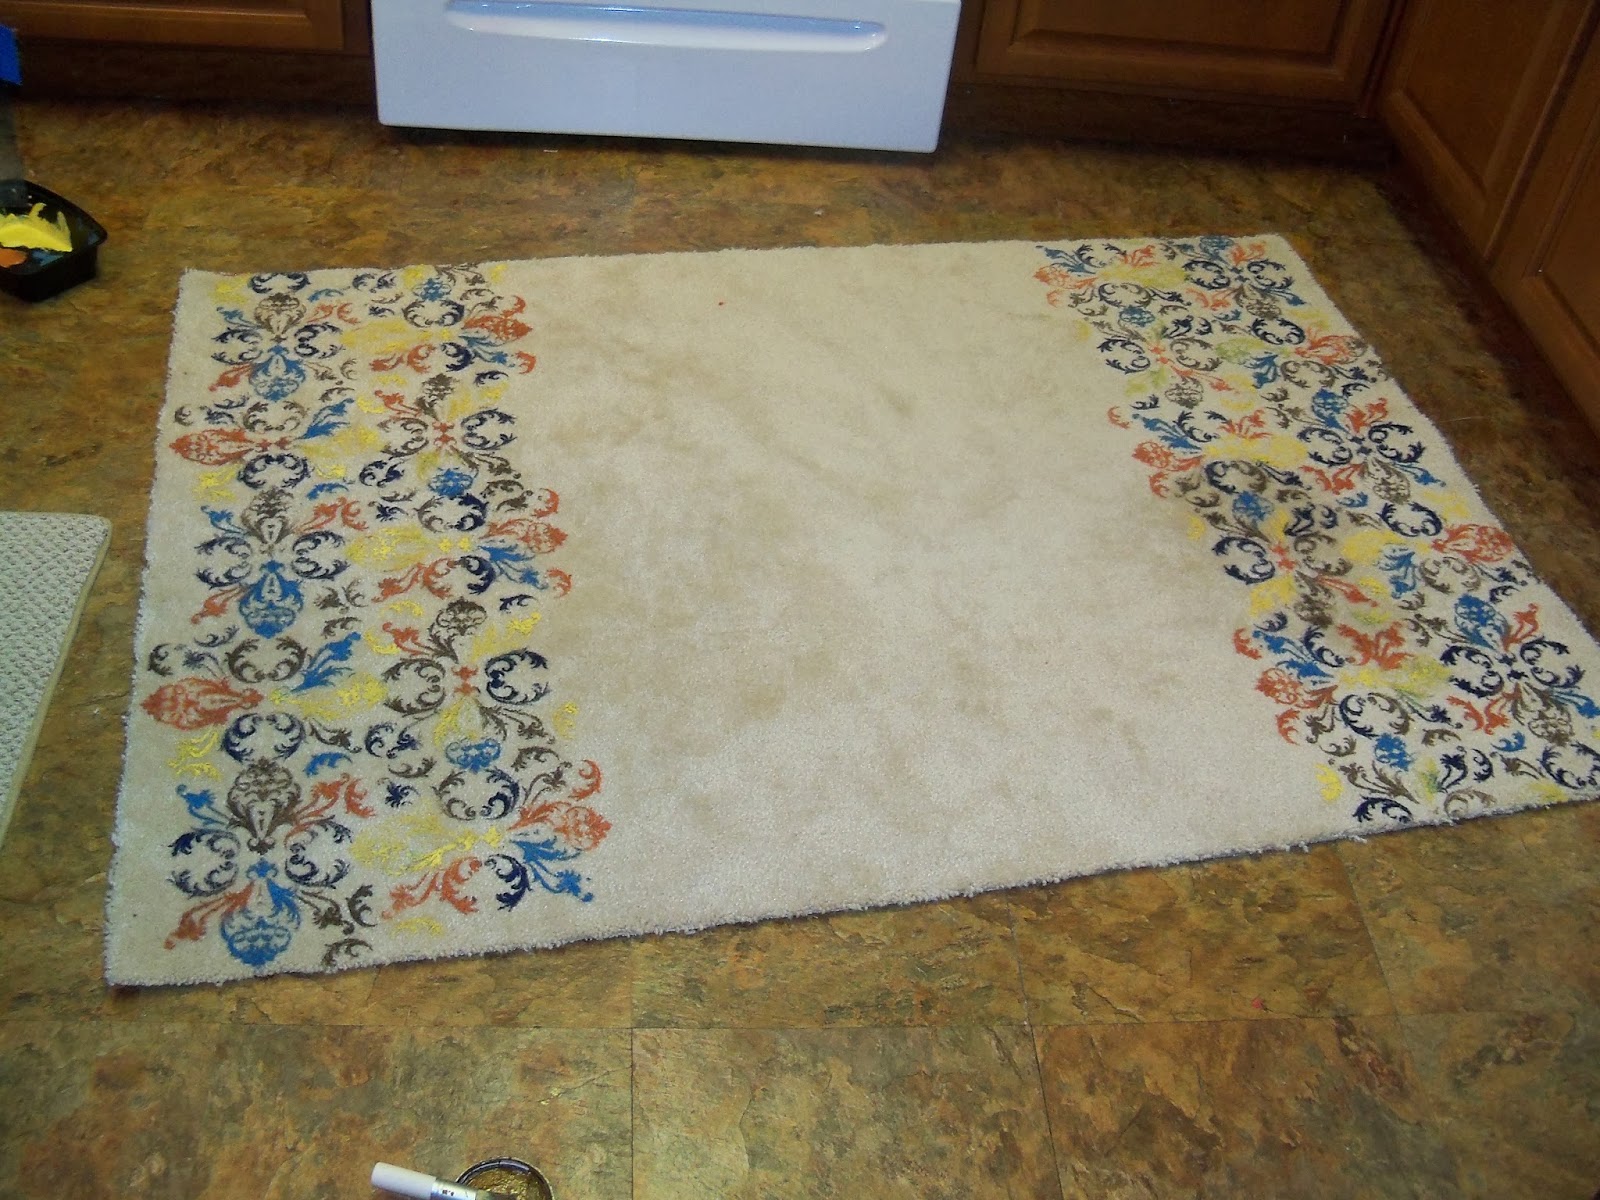
This other rug, was a $10 rug from Home Depot.  It has the pile I was expecting for trying out rug painting.  And this price is also bearable if I totally screw it up.


I've had this stencil forever and finally get to use it. Everything I saw in Joanne's was tiny.


I want to say he was my helper,  but two pounces and he bounced.


I got this tiny stencil from Joannes....part of my winging it.


I decided to just let the creative juices flow.  A little here, a little there....


Not bad....


.....so far so good.


SHAZAM!


Now to do it over and over.  Thank goodness for my little helper.


We had fun!


After you did it once the paint on the stencil directed the color.


Cool huh?


I plan to add a fabric border to bind this rug.  I'll update the finished photos when I can get to that.  I will be using this in the master bath.


I planned to use the low pile berber in the kitchen.  So I went with a more subtle color scheme.


 I just used the gold and touched it lighly with the orange for highlights.


I did smudge a little.....hey, gives it character.


Now, you can feel the dry paint on these rugs....the higher pile one moreso than the berber.  For my purposes, its not a problem.  I plan to spray them with scotchgaurd  for protection, just as soon as I can remember to buy it, but so far, so good.

If I wasn't about to list, I would totally paint my stairwell carpets with stencils.  Who cares if it is rough....it would cover the traffic patterns and look awesome.  And the roughness would just add traction.  I've seen painted stairs but it would be so loud here with these darn kids with no carpet on the stairs.  I will remember this when I am in my new house and so house-poor that I can't afford to recarpet the stairs.  I'll just paint the carpet....with oops paint, of course!


Paint and Decoupage


In case I haven't mentioned it, I have been involved with several Meetup groups lately.  I actually started two myself:  one for upcycling in general (crafts, home decor, etc.) and the other upcycling of fashion with clothes refashions, mostly through sewing.  You should check out the meetup website to see if there are any of interest in your area!


The general upcycling group has had one group meetup and two "work on a project" meetups.  One project that I worked was the painting and decoupage of three small furniture pieces.  I invited two group members to come over and help or work their projects.  It turned out that only one member was able to show, but we had a good time.   I did not complete the projects.  Let's just say, I was a little overzealous with what I thought I could accomplish in the allotted time. We were able to paint two pieces (mostly) and decoupage one little part.  We still had fun!

Anyway, I failed to take before shots, but just know that of the three items, two were dumpster finds. I am just now getting around to finishing the pieces up but I must say, I am pretty happy with the results.

A little history on why I was working these projects to begin with.  In getting the place ready to list, I have been working to stage it.  I invited a friend over that has an eye for this type thing and she suggested that the three pieces, which are all close to my front door, were too hodgepodge due to being different colors.  Probably due to being dumpster finds too :)  So she suggested that I paint them all white.  I am not really a plain white kind of person but I do agree that they need to have a consistent look.  Anyway, blah, blah, blah....here they are.

This first one was an oaky orange color, like you can still see on the slots.  My meetup friend and I painted it with a diy chalk paint....not the best I ever made.  It did not cover as well as I have had it work in the past. I decided to leave those slots since the paint wasn't covering well and they would likely chip with use on those anyway.   This was an "other than color" - nice thriftstore junk corral.  


I added the decoupage on the outside for interest and to the inside to hide some of the streakiness.  Now that it is in there, I really like it.


The next item is one that we never got around to at the meetup.  This is an IKEA-like bookshelf that was sitting by a neighbor's garbage cans a while back.  It has travelled around the house for a while in its slate grey color.  It recently landed in the kitchen as a more compact and decorative storage spot for my pantry canisters.  If you look back through my posts, I did have a table there at one point with my microwave on it and tons of pots under it....well remember, this is all about staging.  I had to nix the table to keep the kitchen from looking too small and most of the pots are in the storage unit.  Yes my kitchen is big enough, I just have too much stuff.

I was supposed to paint this white too, but it is a laminate type material.  I know that you should be able to paint that with chalk paint but I just have visions of it scraping off every time I grab some sugar.  And I actually like the grey when it is paired with the graphic on this scrapbook paper.


I am sure my friend will take away some of the stuff that doesn't match so well.


The paper on the shelves is not decoupaged in place.  I just used some sticky squares to hold those.  The grids slide out and I could just see the paper getting ripped when I slid the grids back in.  Or not being able to get the grids to slide due to tacky paper.


I do see excess paper hanging out the back now that I have a picture.  I'll trim that.


The final project, that we did start at the meetup, is this dumpster find shelvy thingy.  It was easily disassembled for painting.  I did the decoupage on my own later.  The shelf was stained dark, scratched up,  very wobbly and is still missing feet (I have balls of tin foil on the bottom for now).


It looks fabulous now!


At the meetup, we discussed ripping the paper to cover these but it turned out fine to just overlap the edge of two pieces.  It blends with the pattern.


I didn't bother to distress since the paint didn't cover well anyway.  It looks like a whitewash.


Now a more cohesive look.  The grey shelf is just a step away in the kitchen.  Even though it is not white, it ties together now because of the decoupage.


These three projects were not my best work.  The paint didn't cover as well as I'd like.  I couldn't find my exact-to knife for cutting the paper.  It is cut very crooked with scissors, even ripped in a few places.  The paper I used was really too thick for decoupage so it has some bubbles where I just could not get it to adhere well.  But for it not be my best work, they look pretty darn good right?  I guess the style of paper just lends to hiding the imperfections.  And going white gave it a whitewashed look, which is also very forgiving.

I am glad I tackled them as a meetup!  Scheduling the time forces me to just get it done.  It was fun to work on them with someone who loves to upcycle like me.  I wonder what my staging friend will think?


Ignore those ugly bi-fold door in the background.  I had to put them back up (where I had a curtain before), because a buyer will want to see doors.  I have it on my list to paint them....I am thinking a hammered bronze color.  Too much?